
Belfast based boardgame & wargame fan. Published games with White Dog Games. Also love good food & Sighthounds. Chicken owner. kerpob on b-sky.
Belfast, Northern Ireland
Joined August 2011
- Tweets6.7K
- Following1K
- Followers738
- Likes41.8K



Dave Kershaw retweeted

Introducing our bully-free channel for kids and adults for all ages: Kershaw Kerpob! "Some Kerpob, Some Not!"
Go subscribe now!
youtube.com/@kershawkerpob

Dave Kershaw retweeted
Newest solitaire acquisition arrived today! Empire of Grass: The Conquests of Genghis Khan from White Dog Games designed by @Kerpob


I am delighted to announce that my solitaire world building game, "Empire of Grass", is now available.
This game puts you in the shoes (stirrups?) of the Khan. You build your empire by laying cards of regions to conquer. Can you do better than Genghis?
whitedoggames.com/empire-of-…

ALT Components of the game
Dave Kershaw retweeted

Sad times! The very last podcast featuring Gary Bain. An opportunity for an outpouring of love for all he has done for me and our listeners! Thanks Gary! Appropriately he finishes with 'One Last Heave' and the advance to Omdurman. Please share! open.spotify.com/episode/1x6…

Dave Kershaw retweeted

Help out Sebastian guys - these micro games are often quite good.

MICRO GAME PLAYTESTERS NEEDED! I am leading a micro game design jam with designers from around the world. The theme is "warfighting" and we need some blind playtesting and feedback. Any help would be appreciated, instructions below. 🎲
🔗tinyurl.com/349yrswb

Dave Kershaw retweeted
Less than 24 hours to go on the Kickstarter for Gallipoli: Ordered to Die.
This game will likely hit the table more than most other wargames in your collection - the rules are simple and each of the 3 scenarios plays in about an hour. Plenty of nail-biting tension and absolutely brutal combat.
Get your order in here:
kickstarter.com/projects/die…


Dave Kershaw retweeted
Less than 3 days to go on the Kickstarter for Gallipoli: Ordered to Die.
We've reached the initial funding target but I'm still holding out hope for the stretch goal of the mounted map!
If you are interested in WW1 or the Gallipoli campaign and you like tense, fast-playing wargames with a low component footprint, simple rules and brutal combat - you need to check this out and back it soon:
kickstarter.com/projects/die…

Dave Kershaw retweeted
4 days to go on the Kickstarter for Gallipoli: Ordered to Die.
This is my simple, fast-playing wargame about the Gallipoli campaign. ANZAC's battling the Ottoman Turks in brutal, close range trench warfare.
If you're a casual wargamer, a serious wargamer or just someone interested in the Gallipoli campaign, this is well worth adding to your collection!
Put down a pre-order here:
kickstarter.com/projects/die…

Dave Kershaw retweeted
Exactly one week to go on the Kickstarter for my game Gallipoli: Ordered to Die.
The battles of Anzac Cove, 1915. Plays in about an hour. Simple rules, unique combat system and plenty of bluffing and tension due to hidden chits.
If you're at all interested in the Gallipoli campaign, get your order in now!
kickstarter.com/projects/die…

Dave Kershaw retweeted

We put a new update on our Gallipoli #kickstarter. This one isn't about the #game, it's a list of resources for learning more about the battle...including resources for kids, not just adults.
kck.st/4j1Dx0X
Dave Kershaw retweeted
If you're reading this, you probably don't have enough board games on the Gallipoli campaign.
Remedy that problem here:
kickstarter.com/projects/die…

Dave Kershaw retweeted
Paper maps are OK but mounted is so much better!
I really want Dietz Foundation to get a mounted map for my Gallipoli game.
We need some more pre-orders to make that happen.
Consider putting down a pre-order here:
kickstarter.com/projects/die…

Dave Kershaw retweeted
Haven't done much internetting while on vaca--checked the #kickstarter this morning. HOLY COW!! 150% funded. It's worth checking out: kck.st/4j1Dx0X
(And check our website where we are #crowdfunding Sweeping Satellites!!!)
Dave Kershaw retweeted
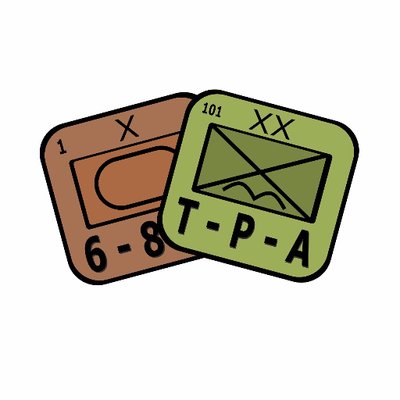
The unit counters in Gallipoli: Ordered to Die are very simple - a picture and unit title, and then just a single number for their combat strength.
When a unit takes a hit you flip it over to its reduced side, where the strength will be lower.
The weakest units in the game are the Ottoman Detachments - which are single sided (can only take a single hit and then removed) and have strength 0. These represent the company and platoon sized units that were scattered around the Gallipoli coastline when the Anzacs first landed. They're not useless though - attacking units always take an automatic hit even when attacking such weak units. So, these strength 0 Detachments will still inflict losses on the Anzacs as they clamber ashore and try to scale the heights. These Detachments form a valuable "speed bump" to slow down the Anzacs while full regiments race to the front.
The next step up is the normal Ottoman battalions, e.g. from regiments like the 72nd, 27th, 7th and many more. These are normal two-sided units with a strength of 1/0. A single one of these units will not be able to successfully attack an Anzac battalion - unless you support it with a Barrage or some Leadership Chits. Or, mass together several battalions and launch a regimental-scale assault. These units are weak but you get a lot of them, and like the Detachments they are perfectly adequate for defence.
Next we have the Ottoman shock troops - battalions from the 1st, 5th and 6th regiments. These are only used in one scenario - the Ottoman Counter-Attack. They are all strength 2/0. This means they are powerful - able to match the Anzacs - but only in the initial assault. They drop down to strength 0 after taking a hit, rendering them the same as other Ottoman regiments. This represents how these supposedly elite regiments showed great enthusiasm and were willing to launch extremely costly bayonet charges in the battles of May 1915, but they became quickly exhausted and were effectively destroyed. This is why they don't show up in the game's final scenario.
The best Ottoman units are the 3 battalions from the famous 57th regiment. These are rated 2/1 - exactly equal to the Anzacs and having greater endurance than the shock troops. Historically, the 57th regiment under the leadership of Mustafa Kemal was the reason the Anzacs didn't achieve their objective on the 25th April. They happened to be on a training exercise in the general vicinity of the Sari Bair mountains when the Anzacs landed. Kemal seized command of this elite regiment and ordered them to race to the heights of Chunuk Bair just as scattered platoons and squads of Anzacs were scrambling up there as well. The counter-attack of the 57th ensured that the highest point at Anzac Cove remained in Ottoman hands, and they would retain control of it for the rest of the 9-month campaign. The 57th regiment is your greatest asset as the Ottoman player.
Now we get to the Anzac side. The majority of Anzac units are strength 2/1 - very strong compared to the Ottomans. The Anzacs had been training for 9 months before the landing and were extremely eager to get into the fight. During and after the Gallipoli campaign they earned a reputation as superb soldiers, especially in close assaults. The Germans, the Turks and the British all remarked on their excellent fighting qualities - the only other nationality to receive such high praise was the Canadians. This is why I felt justified in making even the standard Anzac battalions equal to the elites of the Ottoman side - their combat record and kill/loss ratio justifies it.
The strength 2/1 Anzac units include all the Australian battalions of the 1st, 2nd, 3rd and 4th Brigades, AIF. It also includes the New Zealand Brigade who were of similarly excellent quality. Some battalions of the British 13th Division also appeared in this sector of Gallipoli during the August Offensive - these are also rated 2/1.
Then we get to the "elite" units of the Anzac side. First there is the Light Horse regiment. These cavalrymen didn't get a chance to use their horses in Gallipoli due to the terrain (though they would later use them in Palestine in 1917-18). The Light Horse were some of the best of the Anzac units - they had more stringent recruiting standards, trained very hard and had excellent morale and discipline. At the Nek, during the August Offensive, the Australian Light Horse regiment was effectively destroyed in a series of 4 wave attacks against Ottoman machine guns and riflemen. The fact that these men kept attacking, wave after wave, despite the near certainty of death, shows their mettle in combat.
They are rated as 3/1 in the game. They could have maybe been rated as 3/2, but that would make them a bit too endurable. Technically their battalions had fewer men than the infantry, so their lack of numbers means they can't maintain that higher strength rating after the initial clash with the enemy.
Lastly we get to the best units in the game - the British Naval Infantry battalion and the Gurkhas of the 29th Indian Brigade. These are rated as 3/2 as they were truly elite and had the same numerical strength as the infantry (unlike the Light Horse). The Gurkhas of Nepal are among the most decorated combat units in the entire Commonwealth and are renowned for their deadliness in close combat with the curved Kukri knife. They maintained this reputation throughout WW1, WW2 and right down the modern day. They were fearless and aggressive in battle while still being tactically adept and professional soldiers. Their inclusion in the game is a bit of alternate history and is an optional rule for players. They were involved in the Gallipoli campaign and there was a possibility of the high command sending them in to support the Anzacs. This didn't happen but it was plausible enough to include as an option.
So there you have it - the fighting formations of Gallipoli and the strength numbers I have given them - hopefully you agree with my ratings and they don't seem too arbitrary!

Dave Kershaw retweeted
Posting the strategy article I wrote for my Gallipoli game. This is also on BGG. Have a read:
Strategy Advice
Gallipoli: Ordered to Die is a fast-playing, operational level WW1 wargame. Each unit represents a battalion, and each side will typically have 10-20 units in the field at a time. This game will force you to think like a WW1 divisional-level commander. Above all, it will force you to accept the inevitability of huge casualties, especially on the offensive. As the designer, I thought I'd offer some general strategy advice and then some more scenario-specific advice as well.
General Advice
You have two main assets at your disposal: units and leadership chits. Both of these need to be rationed out carefully over the course of the scenario. Once a leadership chit is used, it's gone. Likewise, once a unit commits to an attack, it takes a guaranteed hit. Basically, you don't want to over-commit. Don't send in 4 units and spend a leadership chit on a single battle when 1 or 2 units on their own will feasibly do the trick. Of course, this is easier said than done, as you won't know how much the enemy is willing to commit until they reveal their own chits. But you can plan ahead - the enemy is not going to get any higher than +2 to their combat score from chits. So, if you outmatch them by 3 or more it's a guaranteed win. To get this kind of advantage, it is far better to rely in Barrages and leadership chits rather than throwing in more units - remember, each unit takes an automatic hit when attacking.
On the defence, don't forget that you can always cancel a retreat by inflicting an additional 1 hit on your own units. This option represents ordering desperate local counter-attacks to regain front-line positions, a staple of trench warfare at this time. As the Ottomans, you will frequently have strength 0 units lying around, either depleted battalions or the Detachments that start the game guarding the coast in the first scenario. These units are perfect for the role of "speed-bumps" - use them to cancel retreats and therefore hold onto your precious territory.
Whether you're attacking or defending, it is critical to keep a reserve. Some fresh units held behind the front line, ready to send in. You may need them to contain an enemy incursion threatening your supply lines. Or to exploit a weakness in the enemy line that may allow you to take high ground. You never know when you will need a fresh unit on hand to attack. Sure, damaged units can still attack - but once they've done that, they're dead. Keep your damaged units on defensive duties and save fresh units for future offensives.
The Landing
This scenario is not only the best introduction to the game, it is also the most fluid and dynamic of the three. There will be a lot of movement, as both sides attempt to stake out a viable front line amidst the chaos of an amphibious landing in very uneven terrain. As the Anzacs, your battalions are landing in 4 waves of 4 units each. Basically, you start with 4 units ready to land and will get another 4 units every second turn. You are in a race against time and a race against your Ottoman opponent - you need to get enough high ground under your control to meet the victory threshold. Historically the Anzacs were expected to take Chunuk Bair on the first day of the landing- this was a near impossible task given the strength of Ottoman units in the vicinity and in the game you will find it just as difficult. So don't race straight for the highest point on the map (Chunuk Bair) - you will overextend yourself and probably allow the Ottomans to cut your supply or slow you down with weak detachments deployed in depth.
Instead, set a reasonable goal - like taking a line of spaces up to Quinn's Post. This should give you the required 8 or more VP. For example, you might take Tabletop, Quinn’s Post, Walker’s Ridge, Plugge’s Plateau, Johnston’s Jolly, Lone Pine and Pine Ridge. This is 8 spaces, each with an elevation and therefore a VP value of 1 each.
You have a choice of where to press hardest too. There is the northern route, leading from Fisherman's Hut to the Apex. This is a tough one as you are advancing along a single, obvious line of approach and the Ottomans can see you a mile away and guard it easily. Then there is the southern route, roughly going from Brighton Beach, around the bottom edge of the map and up into the Arrowhead. This can provide opportunities to outflank the Ottomans but it is a long and circuitous approach. Finally, there is the centre of the map. This is where the bulk of the VP spaces are so it is inevitable that you will fight here. At a minimum, you will probably need to establish a foothold in Plugge’s Plateau and Walker’s Ridge, which you can feasibly do from turn 1.
Generally speaking, you will find it near impossible to get past Baby 700, which is even higher ground than all the yellow-bordered spaces in the centre of the map. The Ottomans will keep a tough garrison there and probably use it to rain down Long-Range Fire chits on the units in Russel’s Top or the Chessboard. The key to securing the centre of the map is using your damaged units to hold territory and your fresh units, which will be disembarking into Anzac Cove every two turns, to push ahead. This scenario is tightly balanced and you can’t afford to over-commit and waste too many units taking scraps of territory in the foothills.
From the Ottoman point of view, this scenario is also a race. You start with a scattering of weak detachments all across the map, none of them strong enough to counter-attack. These initial units are purely there to slow down the Anzacs and deny them ground. You won’t be able to attack with them, they’re too weak. But remember that even a Strength 0 unit will still inflict a hit on each attacking unit. This means the Anzacs will be suffering a unit flipped to it’s damaged side each time they clear out one of your little detachments. While these speed-humps are doing their job, your stronger units will be arriving from reserve. Like the Anzacs, you will be getting a fresh infusion of reinforcements every two turns. Most important among these are the legendary 57th Regiment - three units with Strength 2/1, as opposed to the vast majority of Ottoman units which are 1/0. The 57th Regiment can be used to actually counter-attack the Anzacs and retake lost ground. Do not waste them - once they are damaged you have no units that can go toe-to-toe with fresh Anzac battalions and will only be able to counter-attack by throwing in superior numbers backed up by Barrage or Leadership chits.
A good overall strategy is to rapidly form a defensive line extending through Tabletop, Baby 700, the Chessboard, Quinn’s Post or Mortar Ridge, Wire Gully and Lone Pine or Pine Ridge. Most of these spaces have a convenient fallback point and can hold off advancing Anzacs from multiple approaches. Always be prepared to cancel your retreat by inflicting a hit on your own units - remember if it forces the Anzacs to attack the space again they will suffer a hit on every attacking unit again.
Very often, this scenario will come down to 1 or 2 decisive pieces of high ground, like Quinn’s Post or Russel’s Top. Conserve your strength for these final battles. Having an “Assault” or “Ordered to Die” chit saved for such an occasion can be the difference between victory and defeat.
Ottoman Counter-Attack
This scenario is a true meat grinder. Both sides start very close together, with a packed front line formed by the previous few weeks of trench raids and skirmishes. As the Ottomans, you are on the offensive - and this is going to cost you an enormous number of soldiers. Historically this was intended to be a surprise attack under the cover of dawn, but the Anzacs knew it was coming and prepared accordingly. Hence you have no advantage in Leadership chits - in fact the Anzacs have more than you.
The only saving grace you have is the tougher Guards regiments of the Ottoman army, like the 1st and 2nd regiments. These are represented by battalions with a rating of 2/0. So they hit hard when fresh, but once damaged they will fight like normal Ottoman units (which is to say, basically incapable of offensive action). This 2/0 rating represents the initial valour and enthusiasm of these regiments, but also their brittleness after the initial clash. So think of them as a kind of one-shot weapon that will be used to inflict hits on the Anzacs, softening them up for the waves coming after them. I won’t lie to you - this mission is tough for the Ottomans and will require careful planning and a callous disregard for losses. You will also need to watch your flanks in case the Anzacs decide to launch their open counter-offensive and cut your supply lines - which has indeed happened in some play-test games. As always, put your damaged units on defensive duties guarding the crucial bits of high ground, while the fresh units are used for offensive action.
For the Anzacs, there are a few key pieces of terrain to hold as long as possible. Quinn’s Post is foremost among them. It is in a vulnerable position and will be hit hard - in fact you may not be able to keep it. But make the Turks pay dearly for it, even feeding in fresh battalions to counter-attack. You are severely outnumbered here, but at least you have a few of the elite Light Horse battalions (strength 3/1) which can reliably hold ground or even assault numerically superior enemy concentrations. Just make sure the Ottomans don’t get around behind you - your line is spread thin and it is possible for the enemy to cut your supply line if you leave an opening anywhere. Don’t waste men on frivolous counter-attacks either - it can be worth giving up one or two spaces if you know you can threaten the Turks elsewhere and regain territory from another direction. Finally, remember that this scenario is not explicitly about taking high ground. Any space taken by the Ottoman contributes to their victory condition, not just those with an elevation of 1 or higher. Don’t let them reach the coast!
August Offensive
This is the largest scenario in terms of the sheer number of units on the board. Like the Ottoman Counter-Attack, this is a close range, grinding battle of attrition with the Anzacs on the offensive. As always, the losses will be piled up high.
From the Anzac point of view, you start with 4 VP worth of spaces and need at least 7 to win. This means you need to hold all the ground you start with and take 3 VP worth of spaces. Easy right? Well, not exactly.
You have three main approaches - the north, the south and the centre. The south is the whole area from Brighton Beach up through Gun Ridge and the Arrowhead. The north is the single line of spaces from Fisherman’s Hut to the Apex. The centre is the enormous mass of ground in the middle of the map, with plentiful victory spaces of elevation “1” overlooked by the heights of Baby 700.
Unlike in The Landing, you will not be racing ahead to grab territory - you are already right up against the Ottoman front line and will instead be slogging forward through thick enemy resistance. Even taking a single victory space will require expending entire brigades of Anzacs, plus using your Leadership chits. You will only have a limited capacity to shift units between the various approaches, so generally once a unit has been committed it will be fighting in that zone for the remainder of the scenario. This is why your reserves are crucial. Your units in the Anzac Reserve, Fisherman’s Hut, Shrapnel Valley and Brighton Beach can feasibly be committed to any of the 3 approaches. Your other units - not so much. It is usually not worth spending actions sending units laterally across the map, especially considering the stacking limit of 4 and the tightly packed front line at the start of the scenario. So those units held behind the line should be committed when the time is right - ideally once the Ottomans have committed their own reserve units to a particular sector and left themselves weak somewhere else.
There are also some fancy maneuvers you can try from the beginning of the scenario, like trying to cut enemy supply or threaten their rear areas. If you take Lone Pine and Wire Gully you may be able to cut off the Ottoman units in Johnston’s Jolly, rendering them unable to move and unable to use Leadership chits. If you take Poppy Valley and then Pine Ridge, you will be threatening the Ottoman flanks and will force them to shift units over to Gun Ridge and the Arrowhead to prevent you nabbing easy VP. A similar threat can be made if you take Mortar Ridge or Wire Gully.
Some of these maneuvres may succeed, but the Ottomans have a lot of units to throw in your way. You will have to hit a target space multiple times to take it, sending in waves of 1 or 2 battalions at at a time so as not to over-commit and thereby exhaust too many units. But if you do take a victory space, be sure to move in spare, damaged units to boost the defence before the inevitable Ottoman counter-attack.
From the Ottoman point of view , your job is simple - hold on at all costs. Yes, it is often worth throwing away 3 or 4 battalions of men to hold a single elevation 1 victory space. The “cancel retreat” option is your best friend in this scenario, and will be the main purpose of your many strength 0 units.
Use your Leadership chits early on to help hold front line positions. If you lose a space it will be very hard to take it back - even with chits. The Anzacs are roughly equal to you in numbers, but their units are twice as strong. This is why the high ground is so critical in this game - the +1 bonus in battle for higher elevation is the reason the Anzacs frequently have to commit a whole extra unit, Barrage or Leadership chit when they would rather just send a single fresh battalion. So hold those heights!
You also have plentiful reserves, including some that will arrive later in the game from the turn track. You will need to carefully decide where to send them - once committed it’s costly in actions to send them to another sector of the front. You will also need to counter-attack at least one or twice in this scenario. Your main tool for doing this is the elite 57th regiment - three units with a strength of 2/1. Unfortunately the strength 2/0 units in the Ottoman roster were historically destroyed in the battles of May 1915 (the previous scenario) so they are not in this scenario. The units of the 57th, combined with Barrages, additional strength 1/0 Ottoman units and whatever Leadership chits you have left over, should be enough to wrest back control of a space. Throw in everything you have - unlike the Anzacs you won’t be attacking very often, and if you do attack you need to be sure of winning. You just need to deprive the Anzacs of the 3 VP spaces they need to win. You may even see an opportunity to push into original Anzac territory - if so, take the chance. It will throw off the enemy and force them to redeploy hastily.
In any case, this scenario is going to be a bloodbath for both sides. Like the entire Gallipoli campaign, the August Offensive was an over-ambitious and overly-complicated plan that seriously underestimated the challenges of the enemy and the terrain.
Good luck and happy gaming!
P.S. Game is still live on Kickstarter: kickstarter.com/projects/die…

Dave Kershaw retweeted
The work of a developer is often just as important as the work of a designer.
For my latest game on Gallipoli, I was extremely fortunate to have Dave Kershaw - @Kerpob - offer to be the developer.
For those who don't know Dave, he is a prolific and innovative designer who focuses on making accessible games on historical topics that are often under-gamed or less well known.
Below is a selection of some (not all!) of his many titles. You will see topics ranging from the golden age of piracy to the 1993 intervention in Somalia to Napoleon to early 20th century Mexico, and much more.
Dave helped me a ton with Gallipoli: Ordered to Die. He wrote up two out of the three scenarios, provided the idea of Barrage tokens and more Leadership chits and has cleaned up my initially messy rulebook to make it more readable. He has also handled the vassal mod, the player aid and much more.
You can rest assured that any project Dave puts his mind to is going to be completed with a high degree of professionalism and an appeal to all kinds of gamers.
Take a look at the game we have just launched together here:
kickstarter.com/projects/die…

Dave Kershaw retweeted
If we have a #kickstarter running, I try and check a couple times over a weekend...holy cow!! Our #WW1 #boardgame on Gallipoli is ~90%!!!
kck.st/4j1Dx0X
Dave Kershaw retweeted
Posting my designers notes for Gallipoli: Ordered to Die. This will give you an idea of how I came up with the concept for the game:
Designers Notes
As an Australian, I first learned about Gallipoli in 9thgrade history class. It has been an interest of mine ever since. Every year on Anzac Day I have thought of making a game based on this epic conflict but kept putting it off. Then a few things changed. I got into wargame design in a serious way in the last few years. Also, I am a history teacher and frequently use wargames in the classroom to teach. On Anzac Day of 2023 I was at my local pub, surrounded by patriotic Australians who would all know something about Gallipoli, but not in much detail. They would have heard of Lone Pine maybe, or knew that we landed on the wrong beach, but not much beyond that.
I thought to myself - there should be a game on Gallipoli that could be easily played by high school students AND ordinary people down at the pub AND by dedicated wargamers. A game that's simple, portable, not too expensive, easy to teach and plays in less than an hour. But still shows the complex geography and the controversial command decisions that shaped the battles around Anzac Cove. So, I finally committed to the project that has been brewing in the back of my head for 20 years and started making the game.
There were a few decisions I made early on:
-Focus on the Anzacs: Gallipoli was a huge campaign involving British, French, Indian and other troops as well as the Anzacs. But I didn't want the scale to get out of hand by covering the entire Dardanelles. Zooming in on the action at Anzac Cove would be better for my target audience and keep the game tightly focused. I also wanted scale to be tactical and the units to be battalions, so it all fit together nicely.
-Diceless, semi-deterministic combat. Why? Because this is WW1, and there are not really many huge, dramatic swings in fortune. Battles are costly and based on attrition. As the attacker, it is guaranteed that your units will take a hit. This represents not just the appalling losses of trench warfare and combat exhaustion, but also the fact that Anzac units in this campaign quickly became disorganised when committed to an offensive. I also have gaming friends who HATE dice deciding battles, so that was a factor too!
-Leadership chits: But I didn't want combat to be entirely deterministic. Sure, you're not going to get a breakthrough that turns the whole enemy flank and annihilates their main force (again, this is WW1) but I wanted a way to represent support weapons, heroic leadership and on-the-ground decisions that decided several battles - especially the dramatic moments on the day of the landing where ragged groups of Anzacs reached all the way to the high ground of Scrubby Knoll and Baby 700, but were driven back by ferocious and costly Ottoman counter-attacks led by Mustafa Kemal. This is where leadership chits come in. Each can only be used once, but they provide a bonus (like cancelling a hit or boosting your combat score) that can tip the balance in a key battle. Unlike dice rolls, these are not random and it is up to the players where to spend them. Trying to predict when the enemy will use their chits also adds a delicious uncertainty to the game. Can we break them here? Will they rally their line? One more big push might just do it!
-The map: The terrain absolutely dominated the battlefield at Gallipoli as both sides struggled to take and hold the high ground. I knew that elevation should be a key factor, so spaces are rated for this. I also chose a point-to-point layout because it easily shows possible pathways to your objective and channels movement into historically plausible routes. For example, much of the battlefield was unscalable cliff faces - this is represented by such places having few links to each other. The Anzac advance becomes funnelled into a few key ridges, gullies and hills, which the Ottomans can contest by raining down long-range fire from the higher ground. Then you have spaces which will be fought over repeatedly, like Lone Pine and the Nek, due to their position.
These basic elements have remained in the game throughout its development. Of course, play-testing has helped clean up a few rough edges. Luckily, a large number of people around the world (including from Turkey) agreed to test out the game, and their feedback has been extremely valuable. The victory conditions needed the most work, but now we have a game that is challenging for both sides.
Whether you play as the Anzacs or the Ottomans, hopefully you will find the game a challenging and evocative tribute to this tragic battle.
If you're interested in the game, link for pre-order is here:
kickstarter.com/projects/die…
